
Onions are easy to grow, have a fairly short growing period and take up little space in the garden. If you don’t have a vegetable garden, plant a few onions in your flower garden or in a pot or box and set them on your patio or in a sunny window. For an easy perennial onion patch, grow potato onions. Almost a lost variety, with flavor stronger than shallots, they can substitute for regular onions. Buy them once, plant in fall or spring, and enjoy harvests for decades.
Where to Grow Onions
Onions are a cool-season crop, hardy to frost and light freezes, although certain varieties are exceptions. They can be grown practically everywhere, and prefer a cool-season start. Onions are as hardy as they come. Frosts, freezing temperatures, and snow will not kill them. They should have steadily moist soil and even growing weather to mature at a steady pace. Otherwise, they bolt to seed or do not form good bulbs. High temperatures and low humidity are advantageous during bulbing and curing.
Recommended Varieties of Onions
Common Slicing Varieties: White, Yellow or Spanish Onion (most commonly used)
– Vidalia Onions – good sweet onion to cook with, look for Walla-Walla, Vidalia onions are trademarked and only grown in the state of Georgia.
– Red Onion – known for its sweet taste, often eaten raw on salads, looks purple
– Scallions or Green Onions – grown for its long stem, has little or no bulb
– Pearl Onions – for pickling
– Shallots – mild tasting, small bulb, more expensive than other onion varieties
– Leeks – mild-tasting stalk
– Chives – onion-flavored herb, usually used on salads or as a garnish
Note: Homegrown onions have a much stronger flavor than store-bought onions.
Multiplier onions, such as shallots and perennial potato onions reproduce vegetatively and are usually started by sets. Similarly, bunching onions, such as scallions, Welsh, and Japanese, don’t form full bulbs and are usually started by sets. Sets should be started with small bulbs no larger than 3/8 to 7/8 inches. Sweet onions are best started from seed, as is the common or regular onion.
What’s the difference between Long and Short Day Bulbs?
Most onion varieties begin to form a bulb when the temperature and hours of daylight reach certain levels.
Long Day Bulbs, for northern latitudes, begin to bulb when there is 14-16 hours of daylight.
Short Day Bulbs, for southern latitudes, begin to bulb when there is 12-14 hours of daylight.
| Temperature | |
| Germination | 50 - 85 F |
| For growth | 55 - 75 F |
| Soil and Water | |
| Fertilizer | Heavy feeder, use compost. |
| pH | 6.0 - 7.5 |
| Water | Average |
| Measurements | |
| Seed Planting Depth | 1/2" |
| Planting Depth (set) | 1" |
| Root Depth | 18 - 36" |
| Height | 15 - 36" |
| Width | 6 - 18" |
| Space between plants | |
| Scallions | 1" |
| Bulbs | 3" |
| Average plants per person | 40 |
| Harvest | |
| Wait until the tops fall over; pushing them can shorten shelf life. When bulbs pull out very easily, rest them on the ground to dry and cure. Treat gently as they bruise easily. Turn once or twice in the next few days; cover if it rains. When completely brown, they're ready for further curing. For regular onions, clip the tops 1" from the bulb. Do not clip tops of multipliers or separate bulbs. Spread onions no more than 3" deep on wire screens in a shady, warm, well-ventilated area. Cure for up to 2 months before storing for the winter. The flavor and quality of multipliers keeps improving. After 2 months, check for spoilage and remove bad or marginal onions. Separate multiplier bulbs by cleaning and cutting off dried tops about 1" above bulbs. Keep the smallest bulbs for spring planting. | |
| First Seed Starting Date: | 46 - 92 days before last frost date |
| Companions | |
| Companions | Lettuce, pepper, spinach, strawberry, tomato |
| Incompatibles | All beans, asparagus, peas, sage |
Soil for Onion Growing
A fertile, mellow soil, well enriched with compost and rotted manure. The ground should be free of pebbles and stones and moisture retentive. Since onions are shallow-rooted and need constant moisture to develop well, a well-balanced fertilizer should be worked in before planting. Onion growth and yield can be greatly enhanced by banding a fertilizer rich in phosphorous (10-20-10) 2-3″ below transplants at planting time. Make a trench in the center of the bed 4″ deep and distribute 1/2 cup of fertilizer per 10′ of row. Cover the fertilizer with 2″ of soil and plant onions 6″ from the trench on either side, don’t plant onions in the trench. Plant onions in a sunny location with good drainage and always keep the soil moist.

Red onions 
Walla Walla onion
Planting Onions
Home gardeners have three choices for starting onions: Onion seeds, seedlings (slips), and sets (or bulbs). Seeds take the longest time and should be started indoors, but are the cheapest. Slips give you a head start on growing and are hardy. Onions started from seeds generally grow larger and store longer, while sets are easier and faster to grow, but are more subject to bolting and rot.
When –
Onions are relatively hardy, so planting can begin as soon as the soil is dried out and workable in spring. In milder climates( >zone 8), they can be planted in fall for spring harvest. If planted in too cool weather, onions will not form bulbs. Onions can be planted as soon as the garden can be tilled in the spring, usually late March or early April in prime growing regions. Good fertility, adequate soil moisture, and cool temperatures aid development.
How –
Plant onions 1 inch deep and 3 to 4 inches apart in double rows, leaving 6 to 10 inches between rows. Be sure to leave enough room between rows to weed. If the onions are planted closer together, you can harvest every other plant as a green onion so that the bulb development of the remaining plants is not impeded.
How Onions Grow
The onion is a bulb-forming plant with long, tubular, deep, rich green leaves. They vary in size from the tiny green or spring onions to the large sweet Bermuda-type onion. Colors are white, yellow, and red. Bulb onions mature in response to changing amounts of daylight. The longer the plants grow before forming bulbs, the bigger and better those bulbs will be. In North America, days become shorter after the summer solstice (June 21st). Summer days are longer in the North than in the South, which is the determining factor in choosing the best plants for your area. Be sure to chose a short day, intermediate day, or long day based on your latitude for the best onions. Buying from a local reputable dealer, or a legitimate supplier should offer some guidance to help you choose.

Onions growing in row 
Onions ready to harvest
Cultivating Onions
Onions have shallow roots and compete poorly with weeds and grasses. Timely shallow hoeing and cultivation are important, especially when the onions are small. Onions need fertile moist ground. Side-dress with fertilizer rich in nitrogen every 2 to 3 weeks and water well in any dry spells. It is important to stop fertilizing within 3 weeks of harvest when the necks begin to feel soft.
| Storage Requirements | ||
|---|---|---|
| Onions sprout in the presence of ethylene gas, so never store with apples, apricots, avocados, bananas, figs, kiwis, melons, peaches, pears, plums, and tomatoes. Eat the largest ones first. They are the most likely to sprout. | ||
| Fresh | ||
| Temperature | Humidity | Storage Life |
| 36 - 40 F | 65 - 70 % | 1 - 8 months (dry) |
| Preserved | ||
| Method | Taste | Shelf Life |
| Canned | Good | 12+ months |
| Frozen | Fair | 3 months |
| Dried | Good | 12 months |
Harvesting Onions
Onions are ready to harvest approximately 150 days after planting seeds, and approximately 100 days after transplanting sets. Green or spring onions are pulled as needed when the stems are about 1/4 inch thick.
Pull green onions anytime after the tops are 6 inches tall. Green onions become stronger in flavor with age and increasing size. They may be used for cooking when they are too strong to eat raw. Sweet onions generally store poorly, whereas pungent varieties store well because of a high content of aromatics, which act as preservatives.
Remove any plants that have formed flower stalks and use them immediately. They do not produce good bulbs for dry storage.
For dry onions, those that will be dug and stored, the tops will start to yellow off and fall as the bulbs are maturing probably late July or early August, as can be seen in the nearby image. If the entire row does not ripen uniformly, when the majority of onions are ripe, knock down the foliage of the others with the back of a rake. Dig the onions carefully and allow them to dry in the open sun for a few days. Rinse off the dirt and allow the onions to dry with the tops still attached in the open air for about 2-3 weeks. Then, cut the tops and roots off of the onion, and allow the cuts to air dry for two or three days. This will help to seal the onion and avoid premature spoiling. Store in a porous or net bag in a cool, dry place.
To keep mature onions for a longer period of time, lay them in a single layer on newspaper in a warm, well-ventilated place to cure for 2-3 weeks. Leave undisturbed until the outer skin becomes papery and crispy dry. Select unbruised onions, rub off the stringy roots, and braid the tops. Braid and hang them in bunches or place them in mesh bags and hang away from moisture. If onions are stored in a cool dry place (50 to 60 degrees), they will keep for 6-8 months.
To store scallions or green onions, place them in a jar or vase and put some water in the bottom. You can continue to cut the tips as they grow, and they won’t spoil for quite some time.
Onion Pests
- Thrips – Keep areas near onions mowed to reduce the weedy habitat that onion thrips prefer.
- Onion maggot – Be alert for flies in spring. The adult flies are attracted to rotting onion tissue, so rotate onions with other crops, and compost all refuse after harvesting.
Onion Diseases
The onion family is resistant to most diseases, although wet and humid weather can increase the likelihood of disease. Most members of the onion family are resistant to insect problems; however, above 40 degrees north latitude, root maggots may attack the roots of onion plants. Insecticidal soap sprays are very effective should you have a problem. Onions and garlic are ingredients in a number of organic insect sprays. Buy quality sets and plants to be sure of clean stock.
Why do onions make you cry?
When you cut into an onion, the cell walls are damaged releasing a sulfur compound called propanethial-S-oxide which floats into the air. This compound is converted into sulfuric acid when it comes in contact with water which is why it stings your eyes. Chilling inactivates the propanethial-S-oxide so it does not float into the air. Thus, no tears.
To keep eyes dry when chopping onions, try chilling peeled onions in the refrigerator before chopping. To get the onion smell off of your hands, rub with lemon juice or vinegar. To freshen onion breath, chew a little parsley or a coffee bean.
Other bulb plants for the garden similar to onions:
Garlic:
Garlic is simple enough to grow. Simply pull apart a garlic bulb, and plant the individual cloves about 2 inches deep and about 2 inches apart. Mature garlic bulbs should be ready in 3 months.

Garlic Bulbs 
Shallots 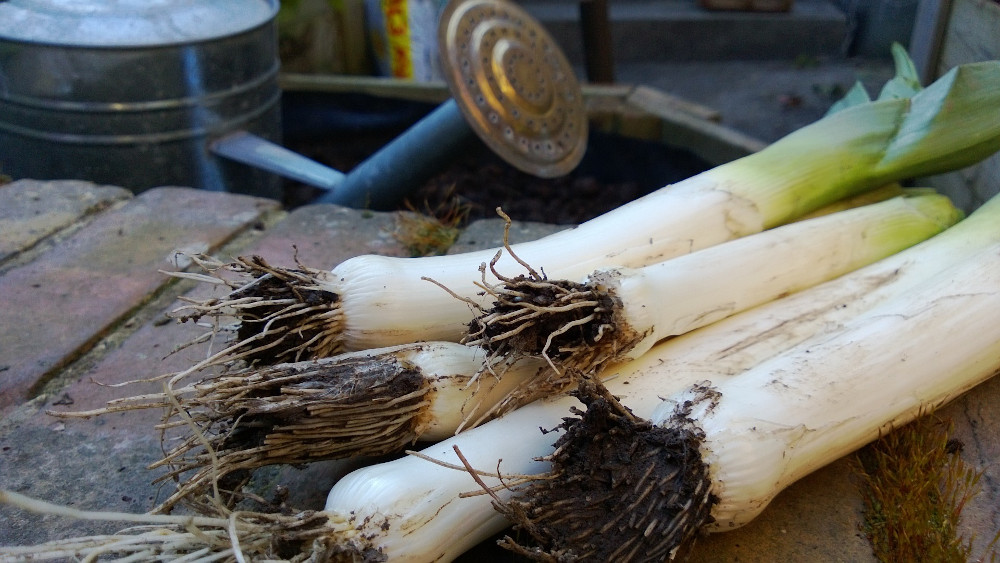
Leeks
Shallots:
Shallots are highly prized by French chefs and can be difficult to find year-round in your local market. They tend to be expensive and are as simple to grow as garlic. The flavor reflects the quality of the soil, however, and since bitter taste seems to follow planting in clay soil, use typical good onion soil for shallots. The tops will start to brown off and yellow when the bulbs are mature, in about 90-110 days.
Leeks:
Unless noted otherwise below, leeks have the same needs as onions. Varieties are Broad London (Large American Flag); Swiss Special; Conqueror. Seed is usually sown indoors about 2 months before planting but can be seeded directly outdoors. Germination is in 10 days. Seedlings are set in a 6-inch trench, in rows 2 feet apart, with 6 inches between sets. The object of the trench is to blanch the leeks white as they grow; the row is gradually filled in as the leeks develop or the soil is merely hilled around the plants as they near maturity; but be careful not to brush soil into the leaf stalks. Leeks should be pulled when fully mature, about an inch in diameter, in 120-130 days. In mild climates, they can be left in the ground over winter and dug as needed. But in colder climates, they should be harvested before frost, although some gardeners have been successful in mulching leeks heavily and harvesting all winter.