Hydroponics is a way of growing plants without the use of traditional soils. Some methods use sand, or some others use an inert medium such as perlite, gravel, or mineral wool. With conventional soil based gardening, the plant’s required nutrients would be dispersed within the soil. Once those minerals dissolve in the water found in the soil, the plant roots are then able to absorb the nutrients. With hydroponics, soil is no longer needed for a wide variety of plants to grow and thrive. The nutrients are dissolved in the required proportions in the water, and then delivered directly to the roots. The soil is just a means of transporting the nutrients to the roots. If nutrient levels are managed correctly, and the roots provided sufficient aeration, most plants can be easily grow without any soil at all. In fact, they can produce significantly more in a hydroponics system compared to conventional soil based gardens. For example: at Disney Land in Orlando, FL there was a tomato plant that had a harvest of more than 32,000 tomatoes with a total weight of 1,151.84 pounds, which got an entry in the Guinness book of world records at the time, and was grown using hydroponic methods. Growing such a large tomato plant would be impossible using a soil based system. It isn’t just about growing super large plants either. Hydroponics is hands down many times more efficient in producing most vegetables.
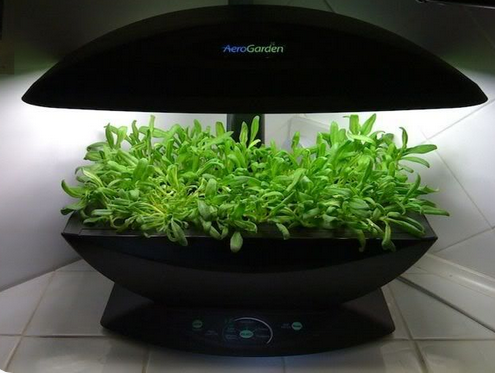
The AeroGarden is one of the simplest and easiest ways to get started with hydroponics. The rest of this page will describe in detail the aerogarden appearance and functionality. Additional links on this site will eventually describe a variety of systems, and cover detailed instructions on how to build a system yourself that suits your needs. The seed pods are prepackaged, so the only maintenance required is to fill up with water every two weeks, and throw in two nutrient tablets. The bulbs will need to be replaced every 6 months to maximize growth. The AeroGarden monitors all of this and will blink its lights to indicate some care is needed.
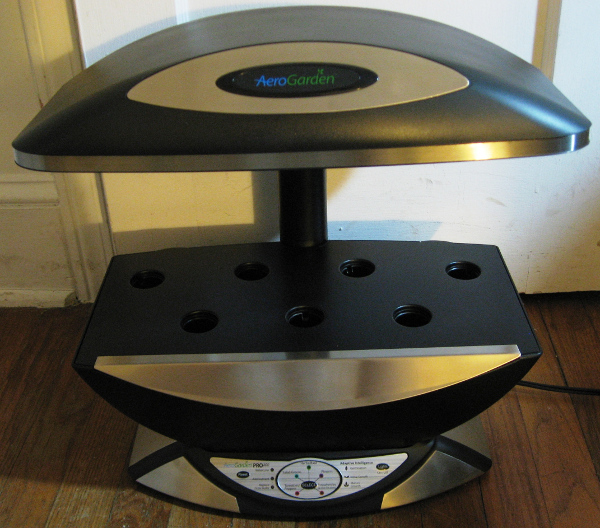
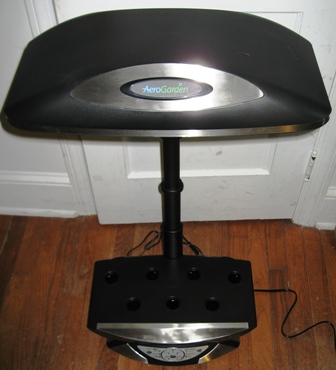
The AeroGarden after unpacking and setup: The model used in this description is the AeroGarden Pro 200. It was chosen because of the ability for the light to extend high above the base, as seen in the following image. The system was a breeze to set up, I can not understand how anyone would have any difficulties with something like this.
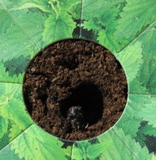
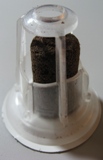
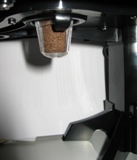
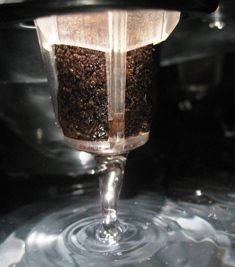
The seeds come in their own box, prearranged as they should be in the Aerogarden. The individual seed pods house the grow sponge, which is brown in appearance and looks very much like a sponge made of dirt. There are certainly a wide variety of hydroponic growing mediums available from third party vendors. More to come on this topic later on. The pod which houses the grow sponge is probably worth keeping though, as the diameter and height of the medium with respect to the water reservoir is somewhat important. The seeds appear to be glued in place near the top of the seed opening in the grow sponge, which is only about 1/4 inch deep. I would imagine if planting your own plants, you could just drop them in the hole. If they are of the slow germinating variety, it may pay to glue them using some sort of non-toxic glue to the top of the grow sponge to avoid any mildew or rot from starting under the moist conditions that are ideal for germination. Once the seeds are planted, place one of these domes over the top to keep the moisture level up. These domes also came with the kit, and are probably worth keeping. The finished seed pods can now be placed in the grow surface.
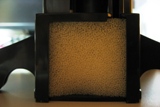
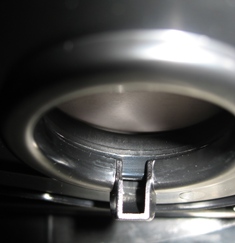
The grow surface appears to basically be a table at first glance, with obvious holes cut in the top for the seed pods. A closer inspection reveals a sponge-like filter material at the base, which filters particles from the water sucked in by the circulating pump. This pump is what actually delivers the water and nutrients to your plant roots, and appears to be located in the central support. The water is drawn up from the central base of the stand and is distributed with a network of channels attached to the underside of the growing surface.
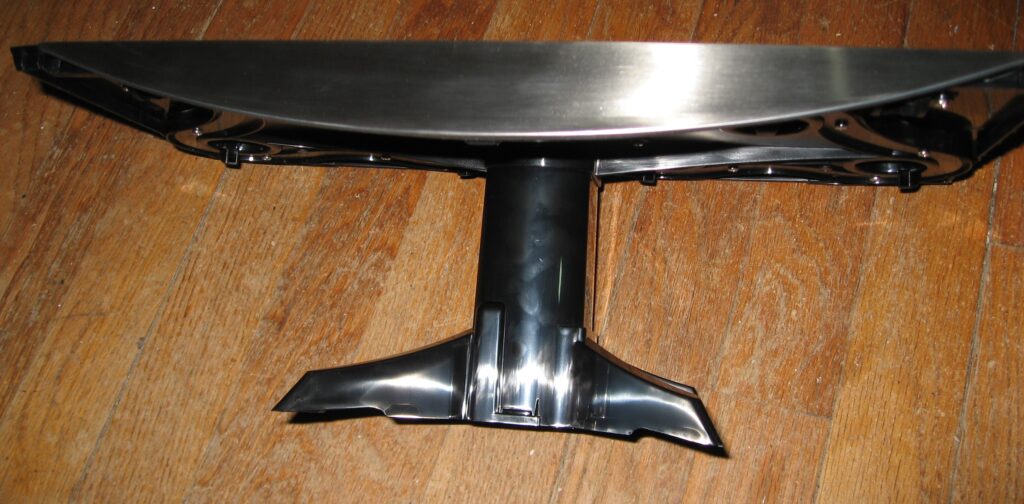
A small spout is clearly visible, and when operational, is where the nutrient-rich water solution is delivered directly to each seed pod. The rate of water flow is steady when on, and comparable to a small constant trickle from your faucet. Look at the image for a good idea of what I am referring to. The same is true for each seed pod.
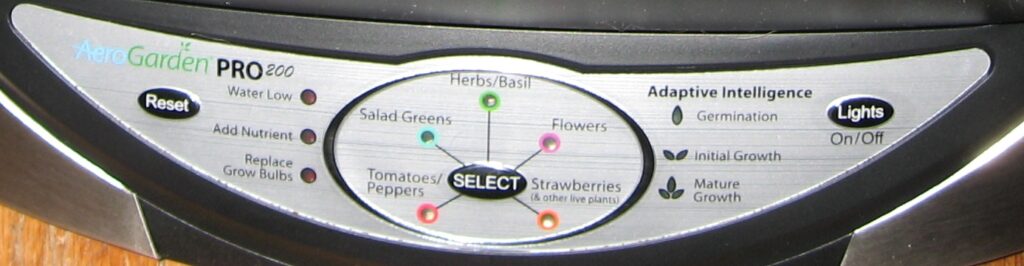
AeroGarden Lights
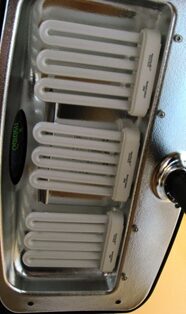
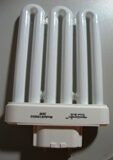
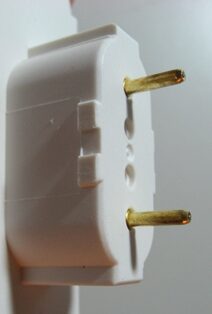
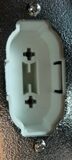
The AeroGarden Pro 200 uses three compact fluorescent bulbs (CFL) with a full spectrum output, which closely mimics the natural sunlight found outdoors. The reflector in the lamp hood directs a majority of the light down towards the plants. Each bulb is rated for 26 Watts and outputs 1560 lumens, and the total output is 78 watts and 4680 lumens over an area of approximately 16×9 inches or 1 square foot. The bulbs do have a specialized socket likely intended to prevent users from purchasing less expensive bulbs from a third party supplier. There are similar bulbs available from third parties, but the cost savings doesn’t really justify the risk, they are only 20-25% cheaper, and would need to be shipped in, when the standard AeroGarden bulbs can probably be picked up locally. If you are still interested check out the Lights of America website, and look at their replacement bulbs; model number 9024B was intended for some sort of desk light and looks pretty similar. If anyone has any success, please let me know.
The lights are on a timer, and are on approximately 18 hours, and off for 6, which does vary slightly from different types of plants as well as through the plant’s growing cycle. The herb setting will keep the lights on for an 18/6 schedule for germination, and will switch to a 17/7 schedule as the plants mature, which is the ideal setting for herbs. The frequency which the pump turns on also changes. For the herb setting, the pump moves water through the seed pods 12 hours a day, while the lights are on. There are 6 hours each day when the lights are on, but the pump is not running. As the plants mature they will need more water and nutrients, so the pump will run continuously during the initial growth and mature growth phases. The Pro 200 does allow for a 24-hour setting, allowing the lights and pump to be constantly on, to maximize growth, called the Super Grow setting. There is a switch on the control panel to allow for manual manipulation of the lights. They will resume their schedule (on or off) at the next regularly programmed time. The system puts off a fair amount of light, and would not be suitable in most people’s bedrooms. It does make a good night strong night light in the kitchen or bathroom. Power to the lights is supplied from the base via a standard figure 8 cord, which allows a great deal of flexibility. A standard light timer could be used to control the on/off times for the lights, and according to the manual, the pump will not operate if the lights are off. The control duration the lights and/or pump are on overtime, so in order to replicate that your timers should be adjusted occasionally as needed.